
Lesson 4 - Creating NFTs on SINFT platform - Crafting Your Digital Art
NFT Creation & Minting
Section outline
-
🎨 Creating NFTs on SINFT – Your digital art studio
In this lesson, you’ll learn how to bring your NFT ideas to life on the SINFT platform. First, you’ll understand the two ways to access the blockchain part: as a regular user (automatic authentication through the Edu part, where you can see campaigns) or as a Lab creator (access via your Labs, with credits automatically transferred to the NFT portal – no password needed). Once you connect your Solana wallet (Phantom – covered in Lesson 3), a tiny amount of SOL is sent to you to cover transaction fees. Then you land on the Creator Dashboard – your main workspace.
The dashboard has three tabs:
-
Cause – Name your campaign and define how funds will be split. You set a public campaign title and a short description of what buyers are supporting.
-
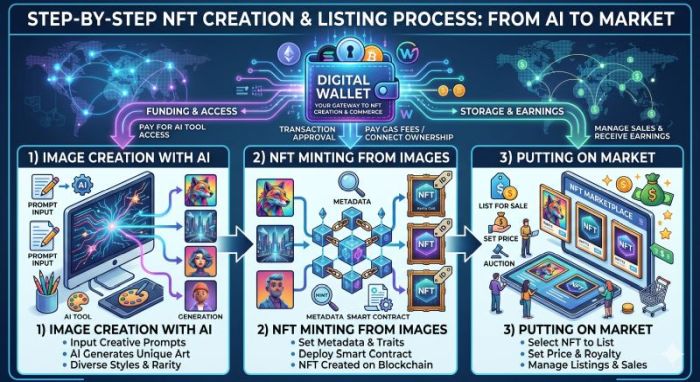
Generate – Create your artwork. You can upload your own images or use AI to generate art. Just type a description (prompt), optionally click “Enhance Prompt” to make it richer, then click “Generate”. Each generation costs 1 credit. There are limits: max 10 generations for Labs with ≤40 total credits, max 15 for Labs with >40 credits.
-
Mint – After saving your images, you’ll mint them as NFTs and manage your collection (covered in the next lesson).
When you’re happy with the generated or uploaded image, click “Save to Campaign” – it appears in the gallery below, ready for minting.
👇 Check out the image below – it shows the NFT creation process and how art creation is first step in this process.
-
Students mustMark as done
In this lesson, you’ll use the SINFT Creator Dashboard to set up your campaign and create artwork. You can upload your own images or generate AI art by writing a prompt – each generation costs 1 credit. Save your favourite images to the campaign gallery, then move on to minting.
-

Shape the Future.
Mint the Change.